Solar Ebike Systems
Solar Kit Introduction

We've had customers building solar charge systems onto their ebikes ever since our earliest days in this business, but interest has really grown in recent years. Solar panels are lighter, cheaper, and more efficient than ever before, and using solar to charge an ebike battery is eminently practical in many situations.
In 2018 we finally participated in the Suntrip solar bike race from France to China, and in the lead up to this event we developed a custom branch of our Cycle Analyst firmware that added solar power logging to the already rich feature set. That gave us the basis for providing solar kit packages explained here.
Basic Hardware
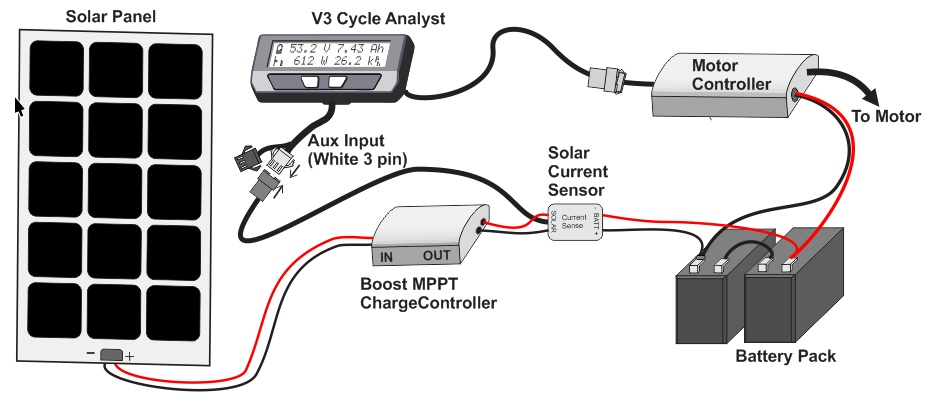
The key elements of our solar ebike systems include the following items:
Solar Panels
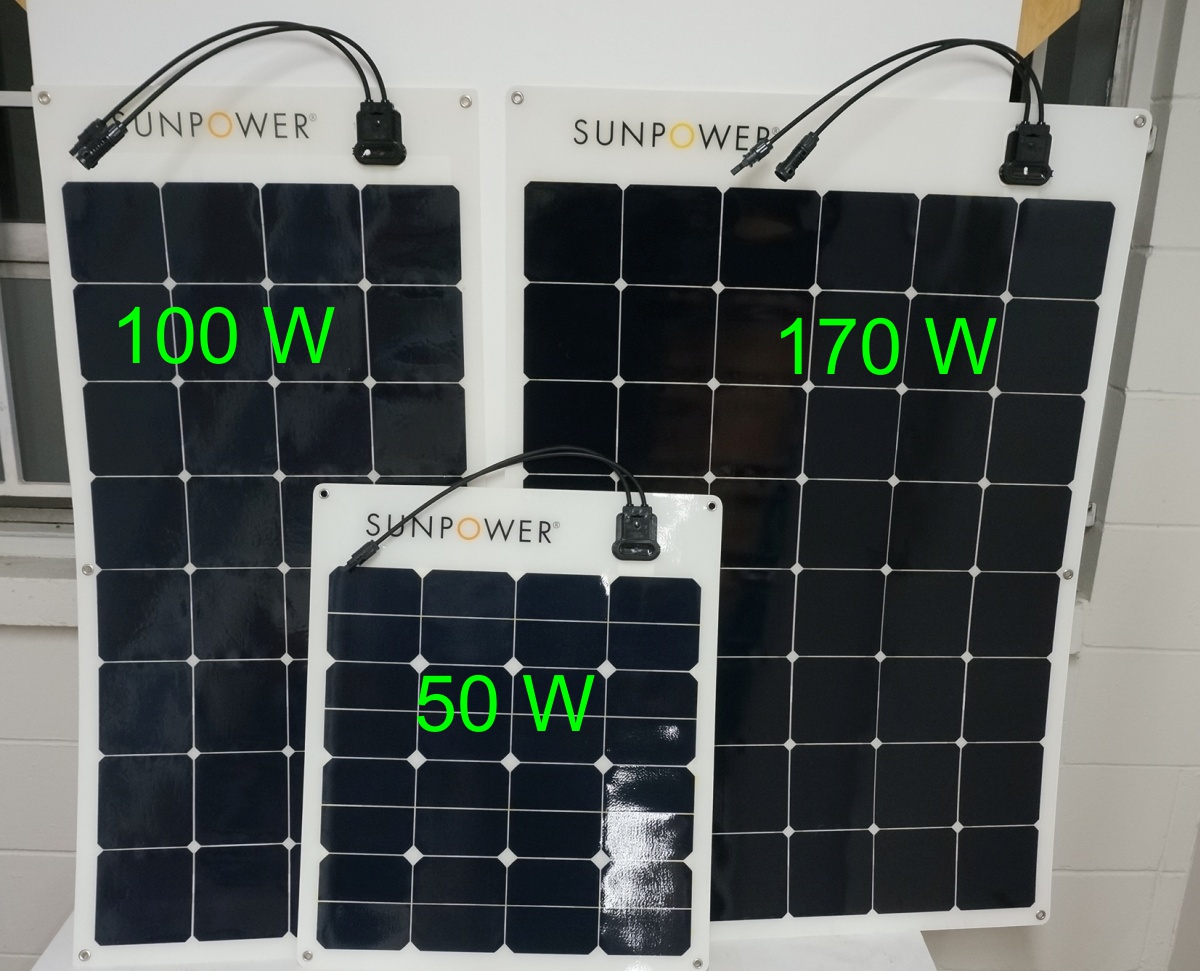 The flexible Sunpower solar panels are among best in class for high efficiency and weight. Panels are rated in watts via a standardized measure, and realistically in most situations you will see about 75-85% of this value in full sunlight, and anywhere from 10-50% of this value in overcast conditions. To get an appreciable charge for touring you need a LOT of panel area, usually at least 200 watts or 1m^2. Smaller panels like 50 watts can be useful if you have a short commute and are leaving the bike parked in the sun all day to top up, but that won't do much to help while actually riding. In addition to knowing the expected wattage of a panel, you will also want to know the nominal voltage and current when it comes to selecting the MPPT charge controller and wiring strategy. Each silicon cell produces about 0.6 Volts and in most panels all of these cells are wired in series. A panel with 24 cells would produce 14.4 volts. The amount of current that flows through the panel at full sunlight depends on the size of the individual solar cells and their efficiency. The Sunpower Maxeon cells produce about 6 amps. So you can see each cell contributes 0.6V * 6A = 3.6 watts of power.
MPPT Boost Charge Controller
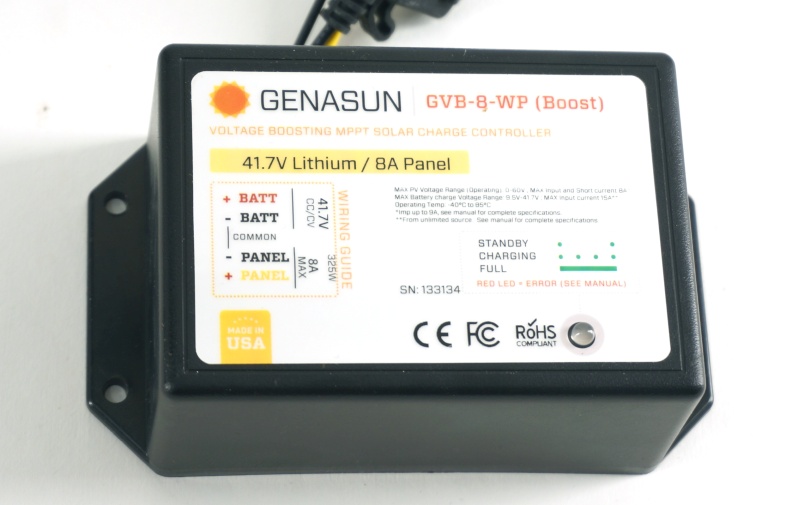 This device is just like a battery charger, but instead of taking AC power from the wall and converting that to a DC voltage for the battery, it is taking the lower voltage DC from the solar panel and boosting it up to the higher voltage of an ebike battery pack. It is also constantly optimizing how much current it draws from the solar panel to get the highest possible charge rate on the battery for the given sun conditions. Unlike a wall charger that charges at a fixed current, the charging current of a solar MPPT will fluctuate with available sunlight.
Cycle Analyst
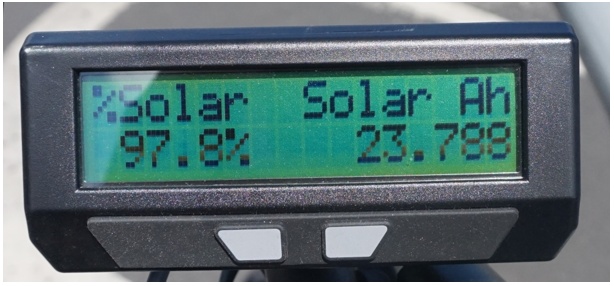 The V3 Cycle Analyst display has an option to load on a custom solar CA firmware that shows not only how many watts your motor and controller are pulling from the battery, but also how many watts your solar system is putting back into it.
Solar Current Sensor
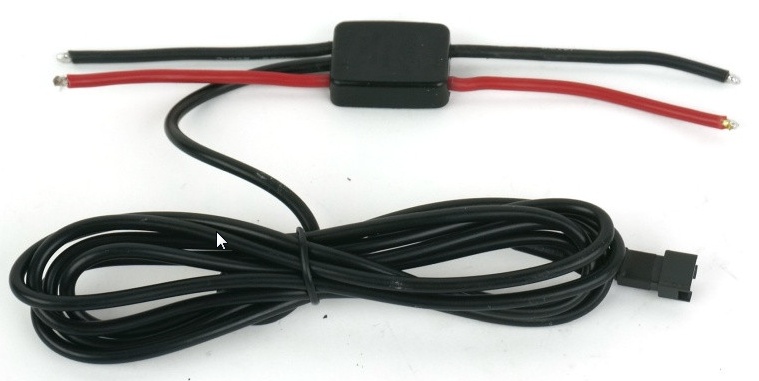 In order for the CA3 to know the solar watts flowing into the pack, a current sensor has to be wired inline with the output of the MPPT. This hall effect current sensor plugs into the white 3 pin Aux input plug of the CA3. The analog Aux In functionality of the CA3 is no longer available for tweaking limits, but those wanting on-the-fly adjustments can still make use of the Digi Aux inputs for discrete up/down adjustment.
Solar DAux Buttons (legacy)
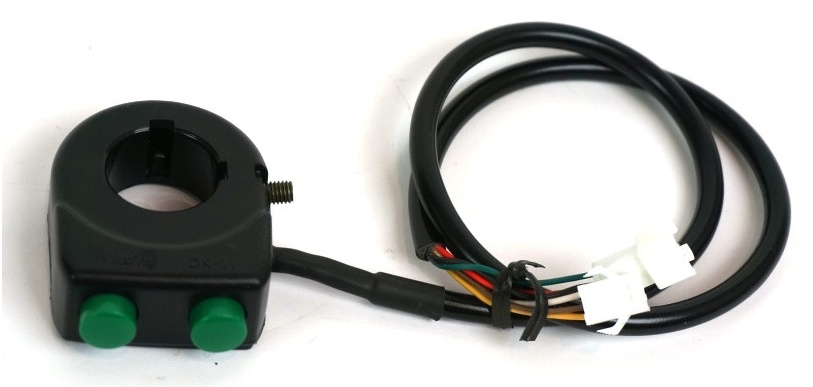 If you have a CA3-DPS or CA3-DP device then the standard Digi Aux buttons are not compatible with the solar current sensor and the solar power readings will not be stable. We make a somewhat different Digi Aux device if you want to have both up/down Aux adjustment as well as a solar sensor on the same plug. With the newer CA3-WP units that come with a MFSwitch, there is no need for this product. The solar current sensor can be plugged in and the up/down buttons on the MFSwitch will still behave as expected.
Wiring Hookup
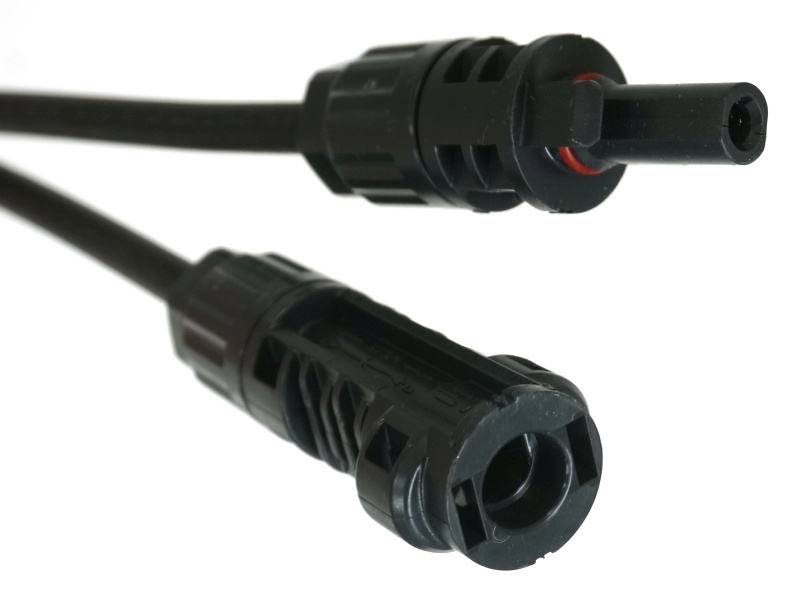 The solar industry has standardized on MC4 connectors. They are robust and waterproof and make it very easy to string panels together in series.
A cable harness needs to connect this MC4 output to the Anderson Powerpole input of the MPPT charge controller. The output of the MPPT charge controller needs to flow through the Solar Current Sensor (if a CA3 is being used), and then into the charge port of the battery pack. In some cases you may also splice into the discharging port of a battery pack, but be aware that you may not have BMS overcharge protection this way.
Multiple Panels
The easiest hookup is with a single solar panel, but more often than not solar ebike projects involve two or more solar panels all charging the same battery pack. There are a few ways to wire things up.
- The panels can be wired independently with each having its own MPPT charge controller. The outputs of the MPPT charge controllers are then wired in parallel to the battery input. This approach has the best performance when some panels are partially shaded or are oriented at different angles, but it is also the most expensive approach since you need multiple MPPT devices.
- If you are using panels that have the same or at least very similar current ratings, then you can wire your panels together in series and treat them as a single larger panel. This has the effect of increasing the panel voltage while the current stays the same. You can do this as long as the combined voltage is less than the max input voltage of the MPPT, and also less than your battery voltage. If the total voltage of your panels in series is higher than the battery voltage, the boost mode MPPT charge controller will not function properly. Series connected panels should be oriented in the same direction; you do not want them facing different angles to the sun (eg. one tilting and one fixed).
- If you have panels that have the same voltage (ie same number of solar cells) then you can also wire them up in parallel, as long as the combined current of both panels is within the input current range of the MPPT charge controller. The Genasun charge controllers are specified to 8A max input current, so you can't hook up two Sunpower panels in parallel as that could supply up to 12A and exceed the rating. The imported programmable MPPT's we carry support 15A, so you can hook up 2 and (for the most part) 3 panels in parallel OK.
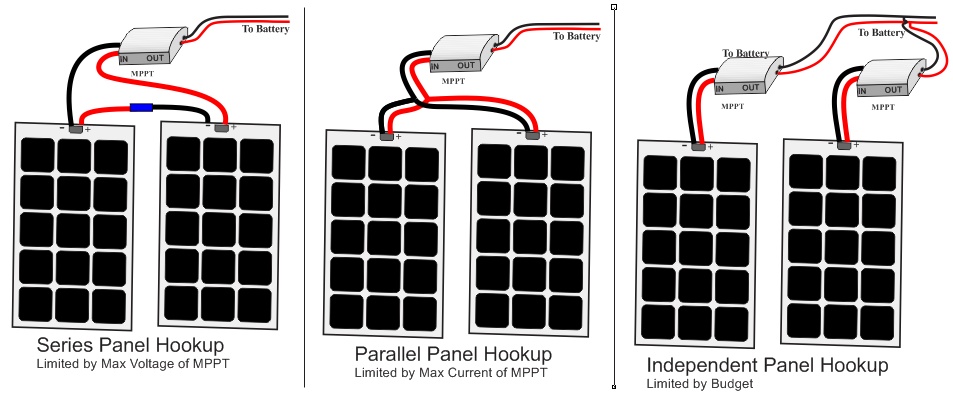
Within these constraints, we generally advise hooking up panels in series if your MPPT at Battery voltage supports it, and if not hook them up independently (if you have $$ to spend on MPPTs) or in parallel (if you are being thrifty). See our youtube video on this very topic.
Cycle Analyst Settings
Vehicles equipped with a V3 Cycle Analyst have the option to monitor solar charging current and amp-hours on the display, independently of the current flowing to the motor controller. This is accomplished with a Solar Current Sense wired inline with the MPPT output leads and a special solar CA firmware.
The signal from this solar current sensor plugs into the white 3 Pin Auxiliary input plug on the Cycle Analyst. The solar firmware can be downloaded via the CA Setup Utility software and once installed it repurposes the Aux Input pin as a current sensing source.
There are two settings that must be set for the solar current to read accurately. The current offset will zero the current voltage point on the input to be zero amps, while the current gain scales how this voltage is converted into charge amperage. On the Grin supplied current sensors, the calibrated gain is laser engraved on the surface of the device.
If you are using a 3rd party current sensor or are unsure of the devices calibration, it is possible in a pinch to wire it up in series with the battery discharge leads and calibrate it against the discharge amp-hours. Both the solar watts and battery watts should read exactly the same.
Mechanical Installation
Securing all of this hardware to your vehicle is now your fun problem to solve! Solar panels are large and awkward, and require the construction of a rigid support structure that doesn't interfere with your handling of your bike. Most people use 1 or more of the approaches below:
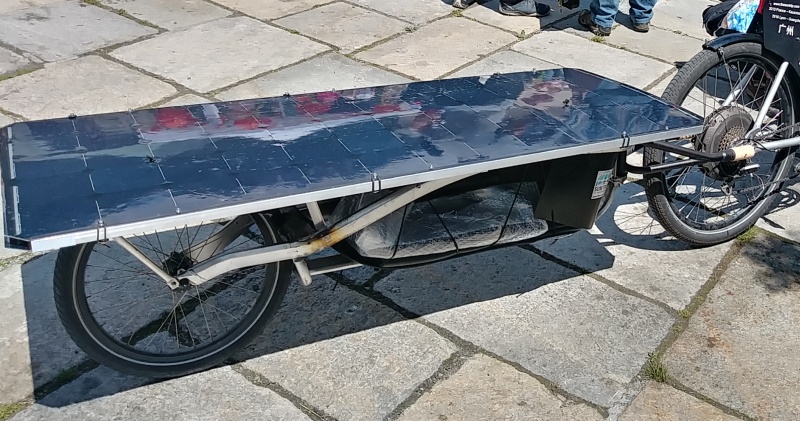 Bike Trailer: If you are towing a bike trailer, then that provides a natural surface on which to secure a solar panel. Trailers are far enough back that the rider's body does not cast shade on the cells, and often they have a suitable mounting surface already present. As a plus side, the whole solar setup is only tied to the trailer, leaving the untethered the bike unencumbered for nimble riding when the trailer is detached. It also results in very little additional wind drag since the panels are sitting on top of an existing surface.
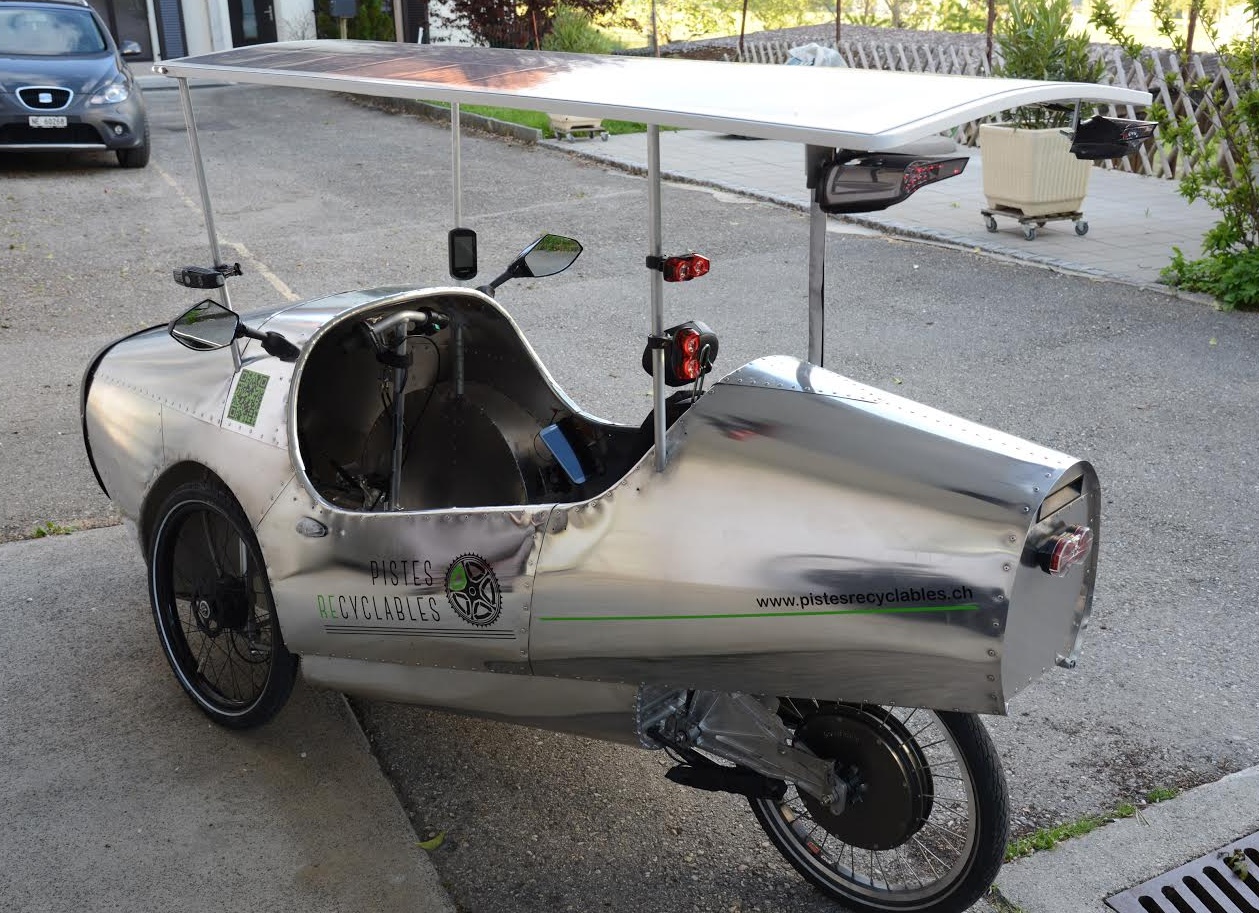 Solar Roof: The most ambitious option is to build a roof over your bicycle on which the solar panels get mounted. This has an added plus of providing sun shade for the rider, and even rain protection too. Solar roofs are extremely tempting on recumbent tricycles which are stable and low to the ground. They work well on recumbent bikes too, but they are more awkward with upright bikes due to the required roof height and corresponding stability concerns in the wind. Extensive custom mechanical fabrication is required to build a roof over any bicycle, and DIY home jobs will often succumb to vibration and fatigue failure over time. As a general rule, do not use aluminum for structural members unless you really know what you are doing. It may be light, but it doesn't like the concentrated stress forces of supporting a roof over bumpy roads.
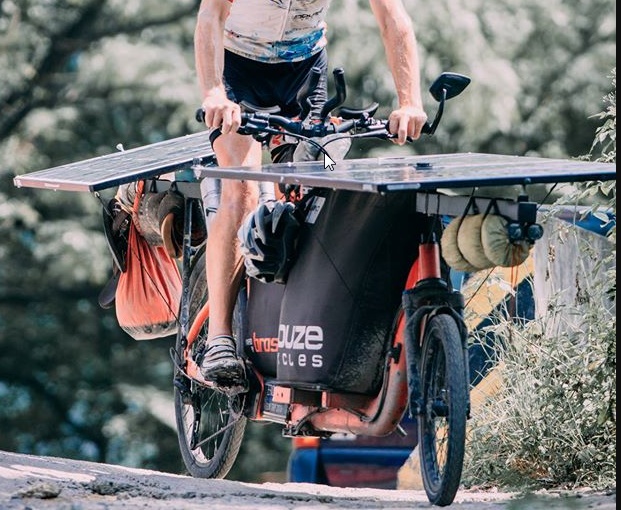 Solar Racks: While bicycle don't have roofs by default, most touring bicycles DO have front and rear carrier racks. In order to use these for solar panel mounting, the racks need to extend much further forwards and backwards than usual, and the proximity to the rider means that the rider's body will frequently cast a shadow on the cells near the bike. Unlike a trailer though, rack mounted solar panels do not result in extra rolling drag, and cause less windage than a whole roof assembly since the panels are in the existing slipstream.
Stowed Solar: Finally, if your main goal is to your ebike off grid and chill out for a while, then you may not need to bother mounting the panels at all. Just carry them with the rest of our camping gear and set them out to recharge your battery at the destination or at various stopping points along the way. No special framework or custom fabrication required.
Range Estimation
Our analysis of solar bikes on the Suntrip race showed that on average people were getting just under 4 watt-hours of energy per nominal panel watt. That's averaging out the cloudy days, sunny days, days riding through forests and cities full of shadows and days riding through open plains.
This is a great metric for getting a ballpark idea of how much extra charge a given solar panel would bring in. Expect a single 100 watt solar panel to average about 400 watt-hours each day, or enough to get a typical 500 watt-hour ebike battery to 80% charged. Any individual day could vary from this by quite a margin, up to 7-8 wh/watt on perfectly sunny day, and as little as 1 wh/watt if it's thick dark clouds overhead.
From there you can extrapolate how far it will take you in kilometers or miles based on your wh/km usage metric. The table below shows some examples of expected range from an average day of solar. 6 wh/km would be someone who uses their ebike motor sparingly, 10 wh/km is typical for using assist all the time but at modest speeds, while 15 wh/km is typical if you are carrying heavy loads and riding fast.
| Consumption Rate | 100 W Panel | 200 W Panel | 300 W Panel | 400 W Panel |
| 6 wh/km | 60-70 km | 120-140 km | 180-210 km | 240-280 km |
| 10 wh/km | 35-45 km | 70-90 km | 100-140 km | 140-180 km |
| 15 wh/km | 25-30 km | 50-60 km | 75-90 km | 100-120 km |
FAQ
Is this really worth it versus just buying an extra battery?
This is an excellent question and we used to routinely challenge people building solar bikes to ask if the cost, weight, and complexity of a solar system really outweighed the cost and weight of more lithium battery. This metric used to favor adding more batteries. If you had the ability to charge up from the grid each night then you were better off buying additional lithium batteries than buying solar gear. Only when grid charging was not an option did solar start having merit.
However, as with so much in renewable energy land the tides have turned. For instance, a 170 watt sunpower solar panel is $300, the MPPT charge controller is $75, and their combined weight is 3.5kg. In sunny summer weather, this will reliably produce about 900-1000 Wh of energy per day. By contrast, a 900-1000 watt-hour lithium battery costs about $700, and weighs closer to 6kg.
Of course the solar system is much more involved to transport, and has additional cost and weight for mounting the panels. The justification is also weather and season dependent, increasingly so the higher your latitude. But on the surface you can see the economic appeal, not to mention being free from searching from hunting down charging outlets each day.
You will never recover your electrical savings, that's not part of the "is it worth it" equation. Electricity from the grid is dirt dirt cheap, so much so that it doesn't even factor in any lifecycle ownership cost analysis of an ebike. Nobody is saying you should build a solar ebike to save money on your electrical bill. But even for home charging a solar setup can be a very practical way to charge your ebike battery if you don't have grid power near your bike shed.
Do I really need an MPPT? Can't I just wire the panel directly to my battery?
In principle yes you can get a solar panel that is higher in voltage than your battery pack and wire it up directly and it will charge. However this approach has the following downsides:
- As your battery voltage changes and the sun conditions change, you may get quite far from the optimum maximum power charge point. You will be charging much slower than if you had an MPPT device in the system. You will spend more on extra solar panels to compensate for this than you would on the MPPT controller.
- By necessity, the open circuit voltage of the solar panel will be higher than the full charge voltage of your battery pack, and that means you are 100% relyant on the BMS circuitry of your battery pack to prevent overcharging. If the solar panels are inadvertently hooked up to the charge port of the battery or the BMS circuit fails, you can be at serious risk of overcharged lithium cells and ensuing unwanted pyrotechnics.
Can you use a buck mode MPPT?
Yes, in principle you can have a total solar panel voltage that is higher than your ebike battery pack and use a buck style MPPT charge controller to step the voltage down to your battery voltage. This is how most 12V solar charge systems are configured, as well as all large scale solar installations. But there are not many buck mode MPPT charge controllers on the market that are compatible with the common ebike battery voltages (36V, 52V), and it would require that your panel voltage is quite high, at least 60V or more.
How important is it to tilt the panels toward the sun?
If you are a geek and technical optimizer, it is of paramount importance. You will spend half of your cycling day thinking about sun angles and devising mechanisms to track it. If you are a pragmatist, you simply point them facing up to get the best average and forget about it, being grateful for all the watts you get, and still wind up harvesting 80% or more of what the technogeeks pull in.
Most of the total daily energy input comes in the middle of the day when the sun is overhead, and an upward facing panel does a pretty good job capturing it. In the mornings and evenings with the sun lower on the horizon, a correctly tilted panel can have 3-4 times the output of one facing straight up, but this significant benefit only exists for a few hours of the day.
What is this about diodes, hot spots in shaded cells, and other stuff?
The behavior of solar panels gets a lot more complicated when a part of the panel is shaded while the rest is in full sunlight. In this case you have most cells with enough sunlight on them to produce the full amperage, while the shaded cells can only supply a small fraction of that current. In a series circuit connection the amperage flowing has to be the same everywhere, so either two things can happen:
- The current flow is limited to that of the shaded cell, meaning you only getting a fraction of the power that the sunny cells are capable of supplying.
- The shaded cells develop enough reverse bias voltage that a large current flows anyways, along with a corresponding reduction in the output voltage of the panel. Most types of solar cell drop 10 to 20 volts when current is forced through them, and that causes significant heat in the shaded cell and a precipitous drop on the panel’s output power (V*A). The Sunpower cells are exceptional in this regard, in that they start conducting current at about -2.5Volts, so the amount of heat when current is forced through a shaded is quite negligible, and the total drop in output power is a lot lower too.
Because of this, many of the caveats about partial shade cover on a solar panel and the need for pass diodes etc. does not apply with the Sunpower panels that we stock.
Solar Ebike Tutorial Videos


 Canadian