Wheel Building
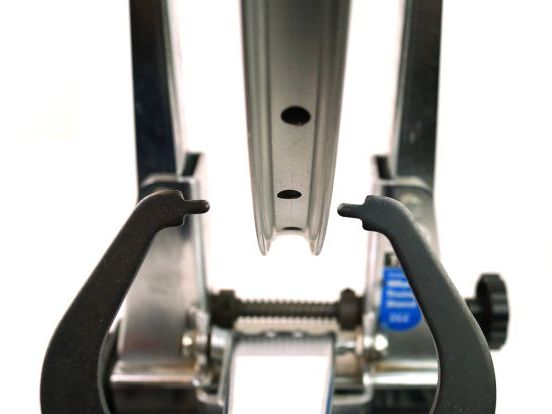
There are many good print and online references for lacing bicycle wheels. Many will defer to Sheldon Brown, Brandt's Bicycle Wheel Book, and others. However, a lot of the points and details with a conventional bicycle hubs don't necessarily apply to hub motors with their much larger flange diameter.
Number of Crosses
Spokes are crossed so that the tensioned spokes have a tangential force component that can transmit torque between the hub flange and the rim. For regular bicycle hubs, the spokes will usually cross over each other 3 times in order to achieve sufficient angle. On a hub motor, the flange is so large that a single cross will usually result in an even larger angle than triple cross in a regular hub. We've seen many times where people have suggested that hub motors should also be laced 2 or 3 cross to be sufficiently "strong", and this makes little sense. A double cross lace can work on small diameter hub motors with large rims, but otherwise it is an extra challenge to lace and results in spoke nipples coming through the rim at steep angles.

Radial Lacing
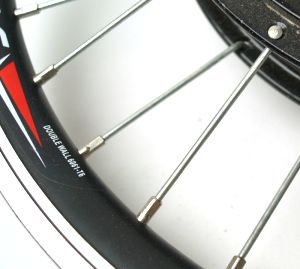
The radial or 0-cross lacing pattern is in vogue for stylish looking front wheels on normal bikes since there is no torque transmission required between the hub and the rim. It is by far the easiest pattern to lace, but in applications where torque needs to be coupled between the hub and rim, there will always be a certain amount of torsional flex on the hub in order to produce a tangential component to the spoke tension.
With conventional rear wheels, this torque comes from the pulsating pedal forces from the rider, and resulting flex can cause fatigue wear of the spokes and loosening of the nipples in pretty short order. Conventional wisdom is that you should never ever use radial lacing on rear wheels or in any application where there is a torque transmission between hub and rim (such as a front wheel with disk or drum brakes). However, with a hub motor, the flange diameter is so much larger that the relative amount of twisting to cause a torque transmission is far less:
It used to be that all hub motors, even the 16" and 20" ones, would use a cross lacing pattern, often nearly butchering the spokes in the process. Then in early 2008 we started seeing most manufacturers switch to a direct radial lace with their 20" wheels. Our experience suggests that with front wheels this is usually OK, since the torque from a motor is steady and not pulsing all the time. However, with rear hub motors the radial build can be problematic to the the much higher frequency pulses of torque coming from each crank revolution
Paired Spoke Holes
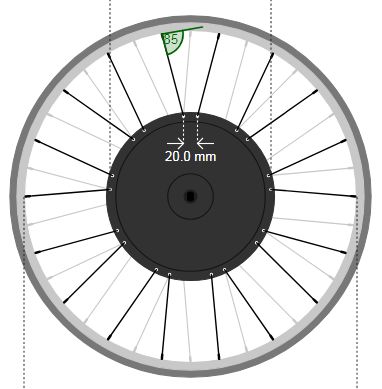 One innovation in hub design that gets the best of both worlds is the use of paired spoke holes, where instead of the spoke holes being evenly spaced around the hub flange they are grouped in pairs that are closer together. With paired spoke holes, even a zero cross wheel build will have a tangential component to the spoke tension allowing for torque transmission between the hub and the rim. This is especially handy when lacing hubs into smaller wheel sizes where crossing would result in an excessive spoke angle. For lacing in larger rims, you can optionally choose to do a single cross or a zero cross pattern, both work just fine.
Determining the correct spoke length with paired spoke holes used to be a tricky challenge in trigonometry or and exercise in trial and error, but we made it super easy with the addition of a paired spoke hole option in our online spoke calculator. For even more exotic lacing options of hub motors there is a recent addition to Sheldon Brown's page on special large diameter hub lacing , which goes over using hubs and rims with different hole counts to achieve a similar effect (tangental spoke tension without actual spoke crossing)
Spoke Gauge
Hub motor wheels are typically supplied by the manufacturer with 13 gauge (2.3mm) spokes. Meanwhile, the spokes available from bicycle stores are almost always the thinner 14 gauge (2.0mm). Some manufacturers such as Crystalyte had so many issues with even their 13g spokes breaking that they went to very thick 12 gauge (2.5mm) spokes.
| Crystalyte: | 2.5mm (12 gauge) |
| Most other brands: | 2.3 mm (13 gauge) |
| Standard bicycle wheel: | 2.0mm (14 gauge) |
In principle, a heavier spoke should be stronger and less likely to fail, but when the failure mode is fatigue from bad fitting, it won't help much. There are many downsides to fatter spokes. With 12 gauge, that means that any rim which you use will need to have the eyelets drilled out to accommodate the large 12 gauge nipple, and you'll have a hard time sourcing replacement spokes, nipples, and spoke wrenches anywhere. Thirteen gauge spokes are used on some tandem and touring bicycles and it is possible to source 13g reduction nipples can fit through the hole in a regular rim. However, these reduction nipples have thinner walls than standard nipples and will wind up being the weak point in the wheel build. If you use straight 12 or 13 gauge spokes with proper size 12 or 13g nipples, then you'll need to source special rims with larger spoke holes than standard
In practice, a well built wheel using 14 gauge spokes is more than strong enough to withstand the forces in even powerful hub motor setups. But most hub motor flanges are drilled out to accommodate 13 gauge or thicker spokes, and the small head from a 14g spoke won't seat well and can sometimes even can pop through.
One of the best solutions to this is to use butted spokes that are 13 gauge at the bend, where the fit through the hub flange, and taper to 14 gauge at the threaded end. Then they can be cut and threaded to any length by better equipped bike stores, they use standard 14 gauge nipples, and they still seat properly in the holes in the hub motor flange. This is our go-to method of doing all wheelbuilds at Grin, and we recommend it to anyone who will listen.
Seating at Bend
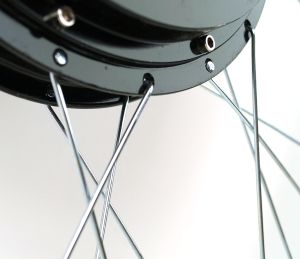
A common reason for spokes to fail on hub motors isn't because the motor puts extra strain on the spokes, or because the spokes aren't a thick enough gauge, it's because of fatigue failure from spokes that aren't held snug against the flange. If the spoke bend radius is too large or too far from the head, then it can flex up and down at the bend with each wheel rotation, eventually causing it to crack and fail.
This problem has been legendary with overseas built hub motors, and we had some Crystalyte shipments where about half the customers would experience spoke breakage on a recurring basis. Ideally the distance between the head and the bend in your spoke will match the thickness of the hub flange, and you won't have problems. But if not, there are two ways to address the situation. One is to insert a washer under the spoke head. The second way is to lace the wheel in an over/under pattern, such that the spoke tension compresses the bend part of the spoke into the flange.
Dishing
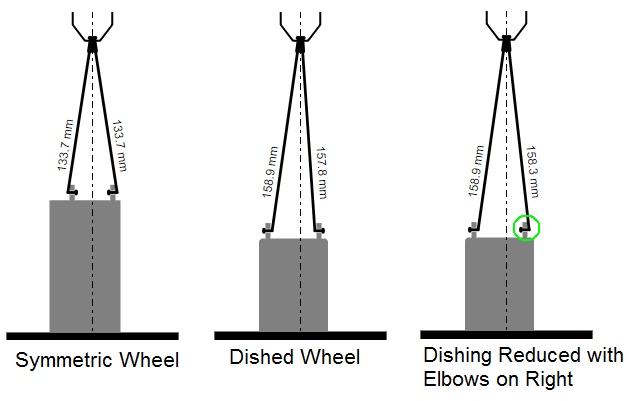 It is standard with rear bicycle hubs that the spokes ont he right side are shorter and more vertical than the spokes on the left, because of the space that the freewheel takes up. On a hub motor, this is no different, except that the flanges are often closer together, and this results in the freewheel side spoke becoming nearly vertical to center the rim. This can be addressed to some degree by lacing the wheel such that on both the left and right set of spokes, all of the elbows come out on the right side of the flange. This will offset the base of all spokes to the right by the flange width. Some hub motor manufactures have offset the spoke flanges from the hub so that they are centered on the axle and don't require dishing.
Videos


 Canadian